In the world of cloud computing and serverless architecture, AWS API Gateway stands as a powerful tool that enables businesses to build robust, secure, and scalable APIs.
In this blog, we’ll see about API Gateway, the benefits of using API Gateway, creating and deploying Rest API, and creating Usage plans to offer API keys. Let’s get started
Table of Contents
What is API Gateway?
AWS API Gateway is a fully managed service provided by Amazon Web Services (AWS) that simplifies the creation, deployment, and management of APIs at any scale. Acting as a front door for applications, API Gateway allows us to create APIs that act as bridges between clients and back-end services, enabling secure and efficient communication.
Benefits of Using API Gateway
AWS API Gateway offers multiple benefits for businesses and developers. Here are a few benefits of using API Gateway.
Scalability and High Availability
With AWS API Gateway, scaling your APIs becomes effortless. It seamlessly handles traffic spikes by automatically scaling the underlying infrastructure, ensuring high availability and preventing service disruptions.
Security and Authentication
API Gateway offers robust security features, including built-in authentication and authorization mechanisms. It supports User Authentication through IAM Roles for internal applications, Cognito for external applications (Eg: Mobile users), and it also supports custom Authorizer.
Integration with AWS Services
As part of the AWS ecosystem, API Gateway seamlessly integrates with a range of other AWS services. This enables us to leverage additional functionalities like AWS Lambda functions, AWS Cognito for user management, and AWS CloudWatch for monitoring and logging.
API Lifecycle Management
With API Gateway, you can easily version, deploy, and manage different stages of your APIs. This simplifies the process of rolling out updates, testing new features, and managing different environments such as development, staging, and production.
I hope by now you understood what an API gateway is and why it’s valuable, let’s dive into creating our very own API Gateway.
How to create AWS API Gateway?
In this section,
- We are going to create a Rest API with
GETmethod, - Integrate it with a simple hello world lambda function and deploy it.
First, let’s start with creating a Lambda function
How to Create AWS Lambda function?
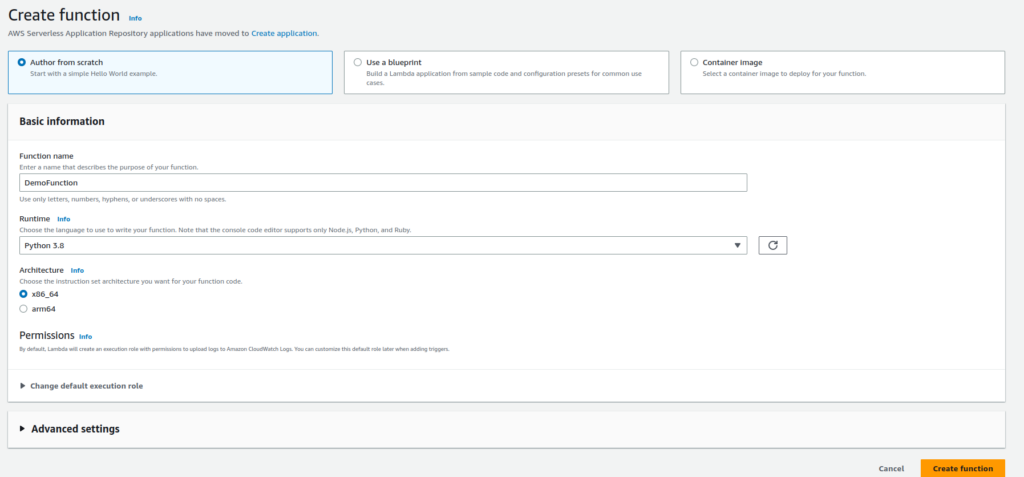
Step 1: Log in to the AWS Management Console and search for “Lambda” in the AWS Management Console search bar. Click on Create Function

Step 2: Select “Author from scratch” option, enter a name for your lambda function, select “Python” runtime and click create function button at the right bottom.
Step 3: Once the function is created update the following code and deploy the changes
import json

def lambda_handler(event, context):
    body = "Hello from 5minslearn!"
    statusCode = 200
    return {
        "statusCode": statusCode,
        "body": json.dumps(body),
        "headers": {
            "Content-Type": "application/json"
        }
    }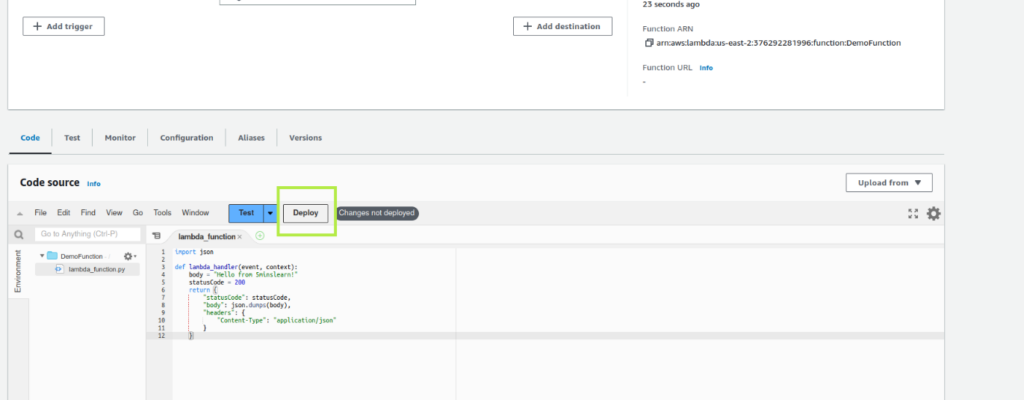
Congratulations! You have successfully created an AWS Lambda function. Now let’s create the Rest API.
How to create Rest API and Integrate with AWS Lambda?
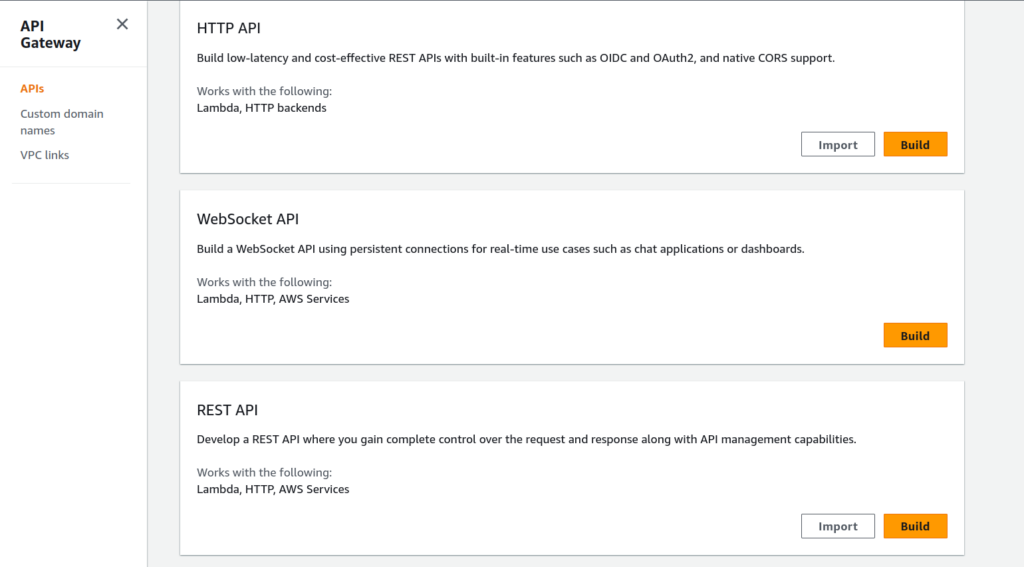
Step 1: Search for API Gateway in the search bar. In the REST API section click on the Build button.
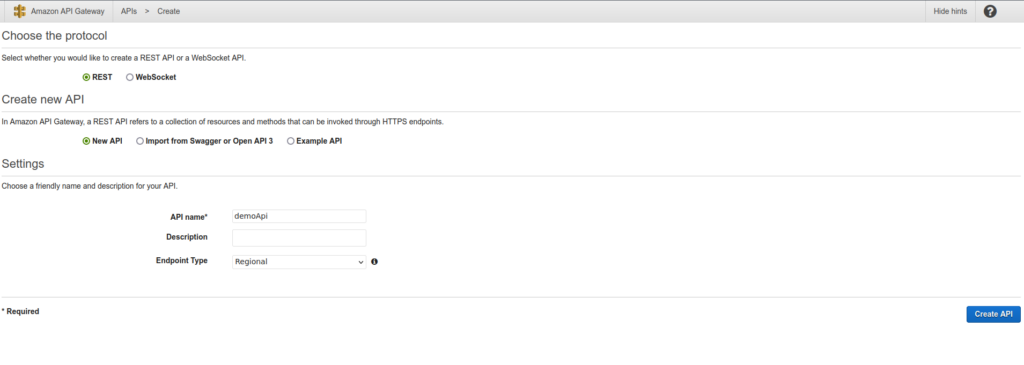
Step 2: Choose the Protocol as Rest and select New API in the Create new API section. In the settings section enter the API name of your choice and leave Endpoint Type as the default and click Create API button
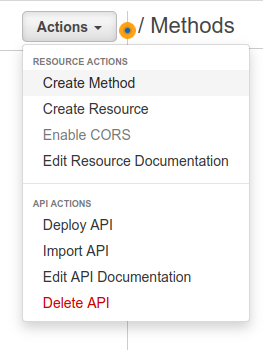
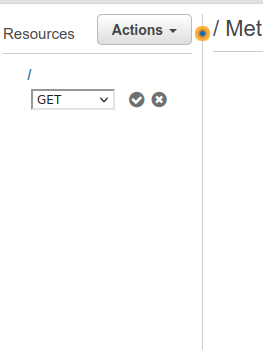
Step 3: Click the Actions Button on the top left, Click Method and select method as GET and click the tick icon
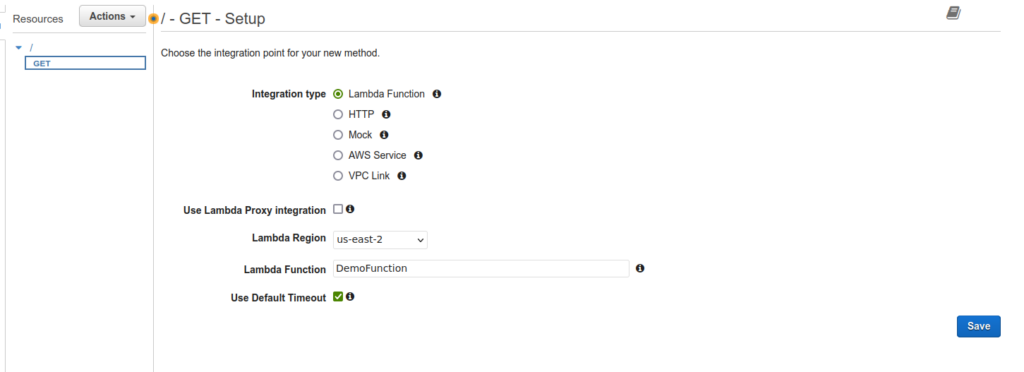
Step 4: Select Lambda Function as the Integration type and enter the name of the Lambda function you created previously and save the function
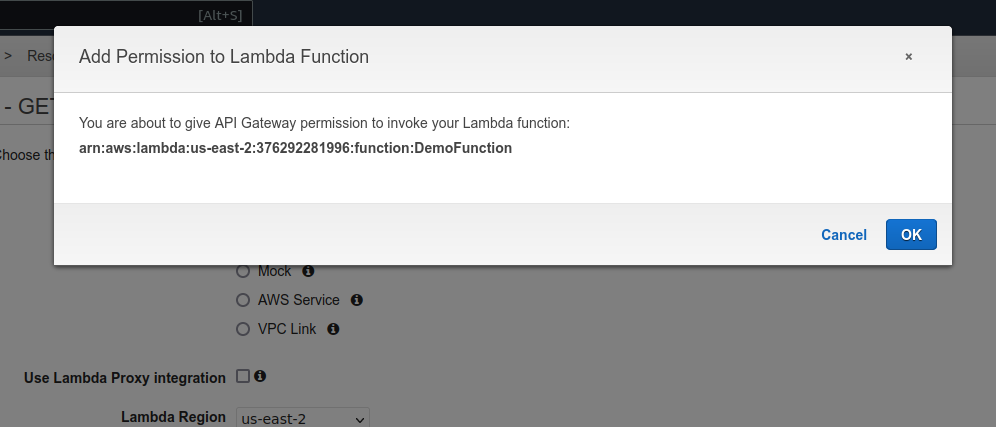
Step 5: Once you click save, “Add Permission to Lambda Function” will prompt for confirmation. This basically means, we’re allowing the API Gateway to invoke a Lambda function. In this case, it is “DemoFunction” Lambda function. Accept the confirmation and proceed to next step.
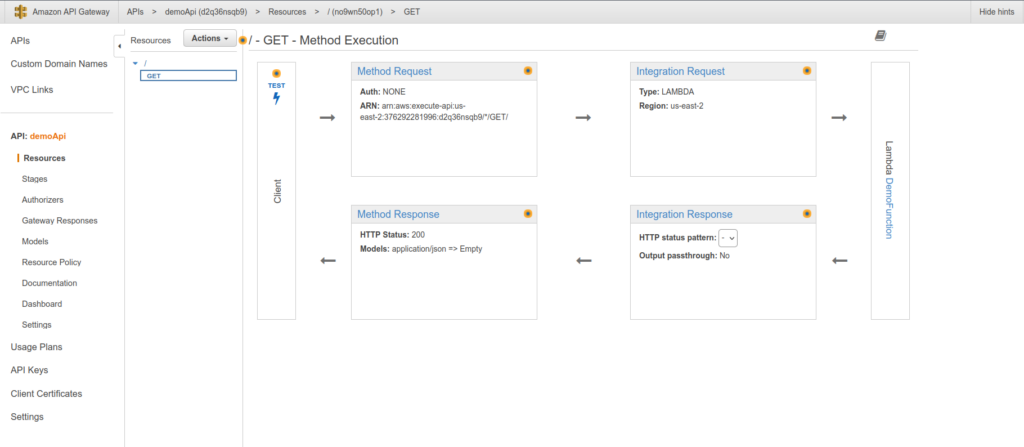
Step 6: Click on Test. It will take you to a new page. Click on the “Test” button. You’ll be able to see the response from the Lambda function on the right side panel.

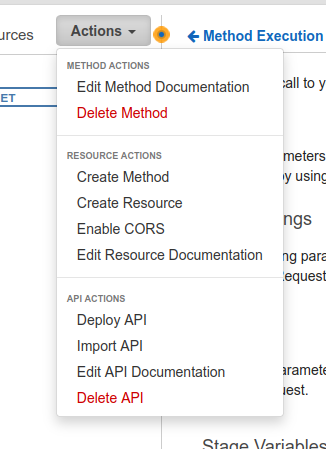
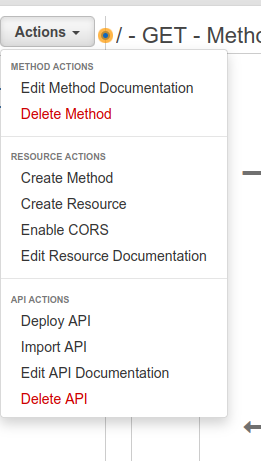
Step 7: As we successfully tested our API, let’s deploy the API. To deploy the API, click on the Actions button once again and click on Deploy API
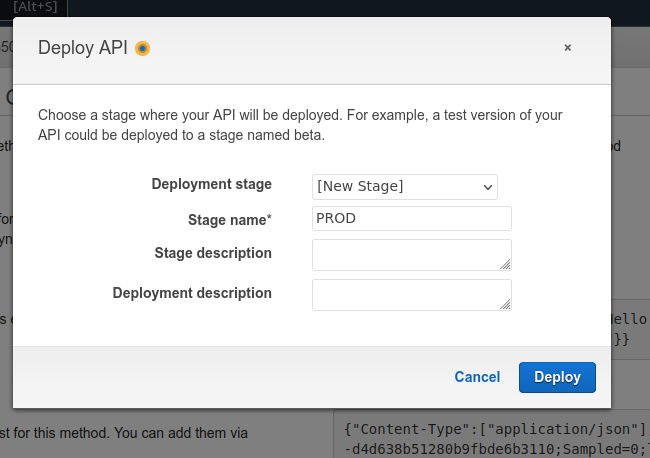
Step 8: Deploy API dialogue will popup. Select New Stage for Deployment stage and name it as per your choice. Click “Deploy” button.
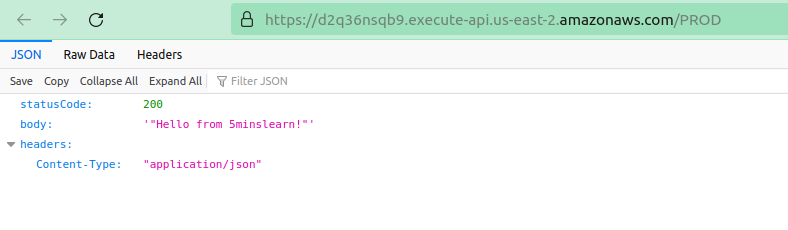
Step 9: Click on the Invoke URL shown at the top. You can see the response from the Lambda function.
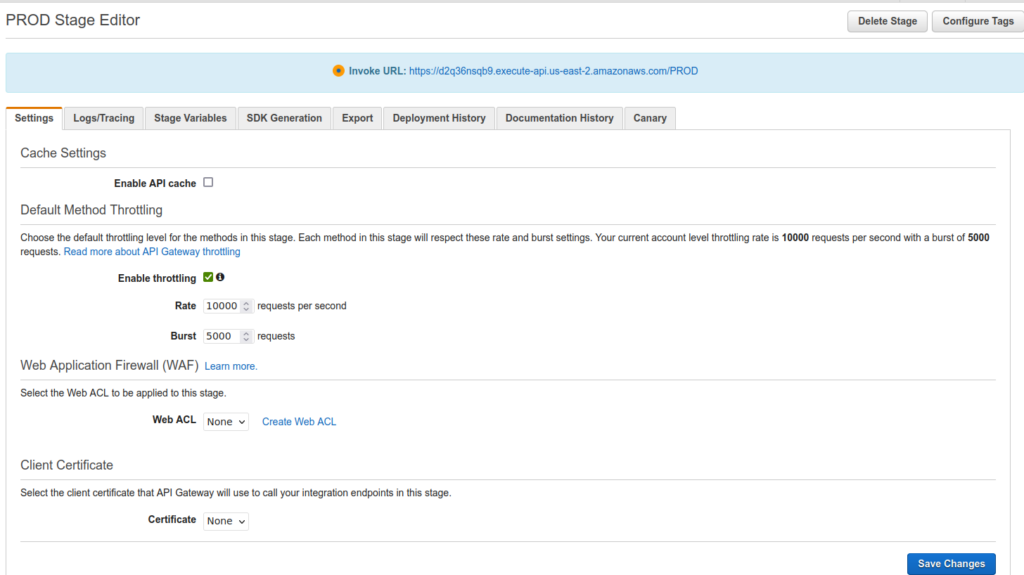
Great! We successfully created the Rest API, integrated with the Lambda function, and deployed it.
But this can done with multiple services available. Why would one has to choose AWS API Gateway?
Well. That’s a interesting question. You’ll be able to configure the usage plan for your API. The best part is you don’t have to write any code for it.
Now let’s create a Usage Plan, generate an API key and make our Rest API accessible only by passing the API key in the Header
How to Create API Gateway Usage Plan and Generate API Key
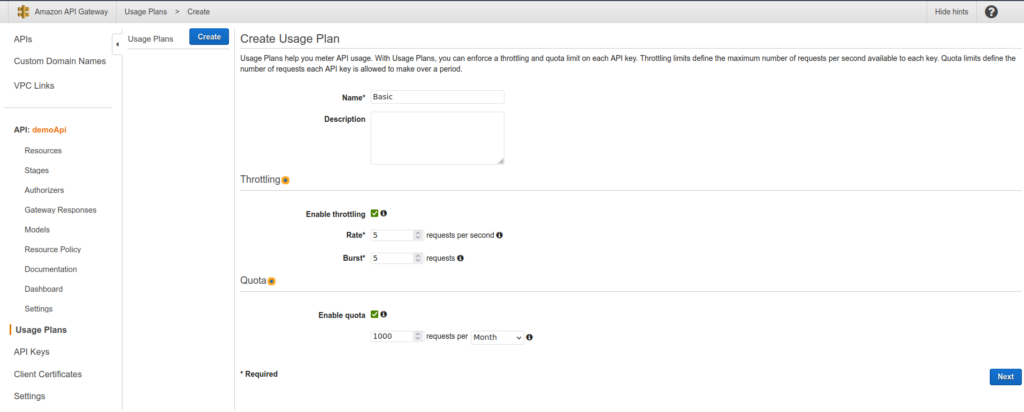
Step 1: In the left side bar click on Usage Plans and click Create button. Enter the Name of your plan, I gave it as “Basic”. Enter the Throttling and Quota section as per your requirement and click Next
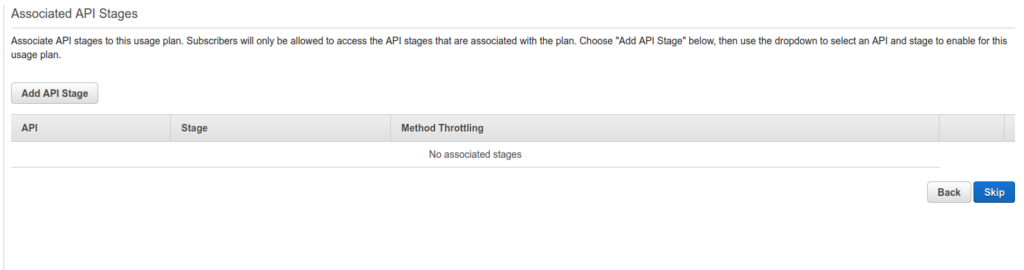
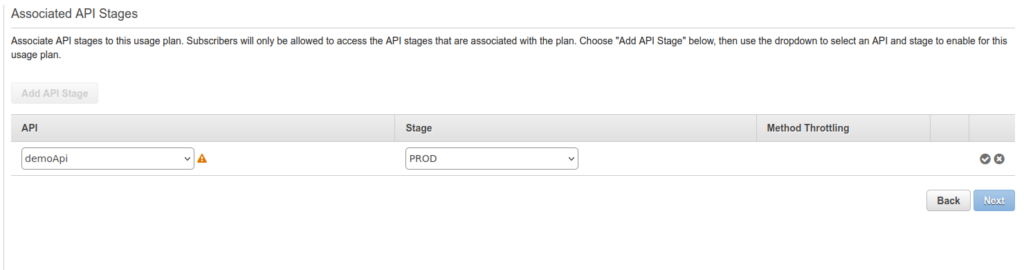
Step 2: Click on the “Add API Stage” button. Select the API and its stage. Click on the tick icon at right corner and select “Next” button
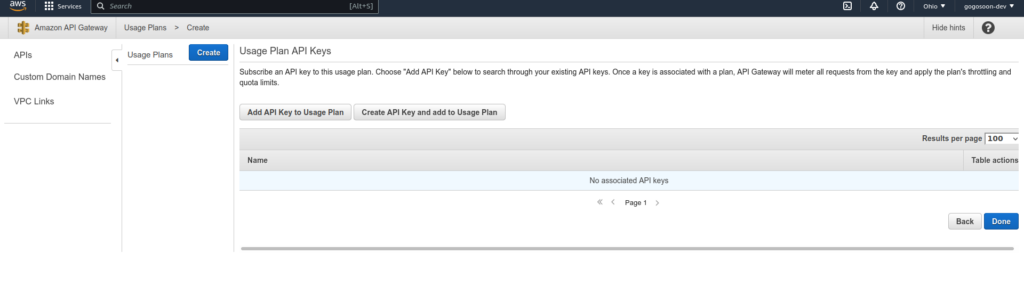
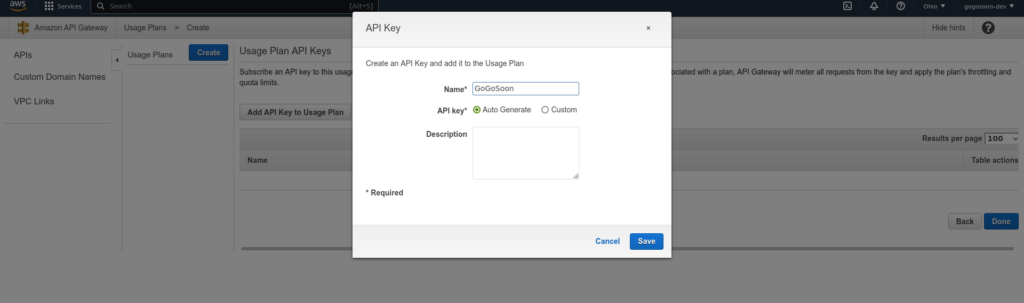
Step 3: Click on “Create API Key and add to Usage Plan”. A modal will pop up. Enter the Name for API Key. For the API key, I selected Auto Generate but if you want to give a custom key you can enter Custom key. Hit the “Save” button.
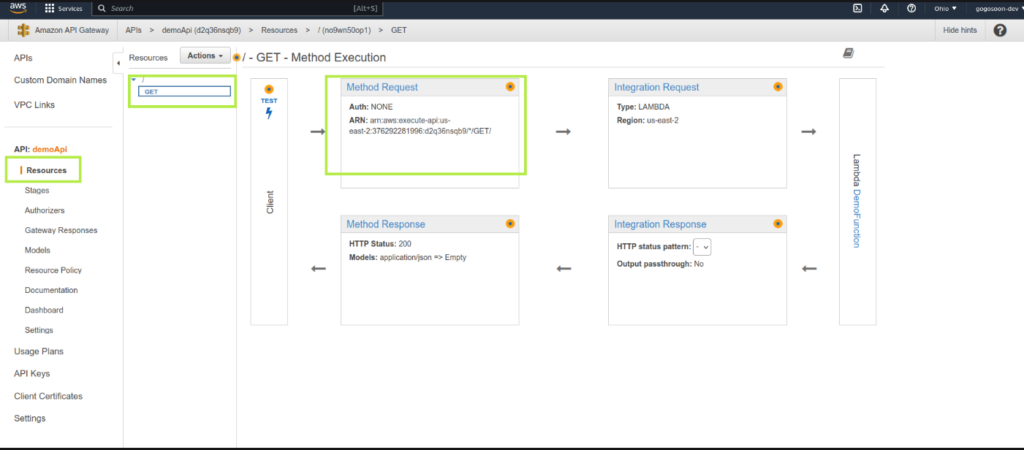
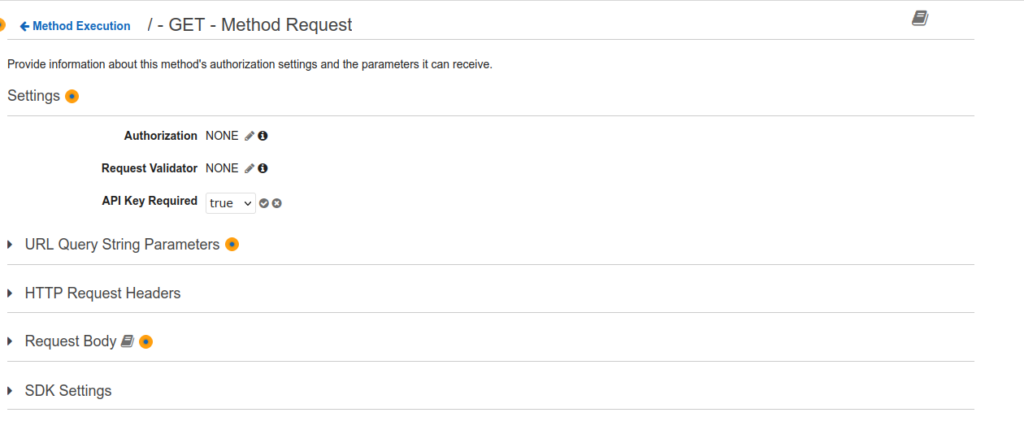
Step 4: Select “Resources” from the Sidebar, click on the GET API you just created previously and click the Method Request.
Step 5: In the Settings section update the API Key Required to true and click the Tick icon. Once updated don’t forget to deploy the changes by hitting the Action dropdown. Your changes will not be updated otherwise.
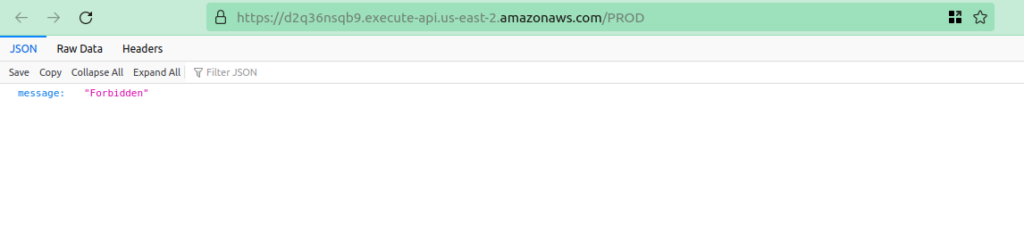
Step 5: Hit the same url now and see the magic.
Forbidden!!!
Because we didn’t pass the API key in the header.
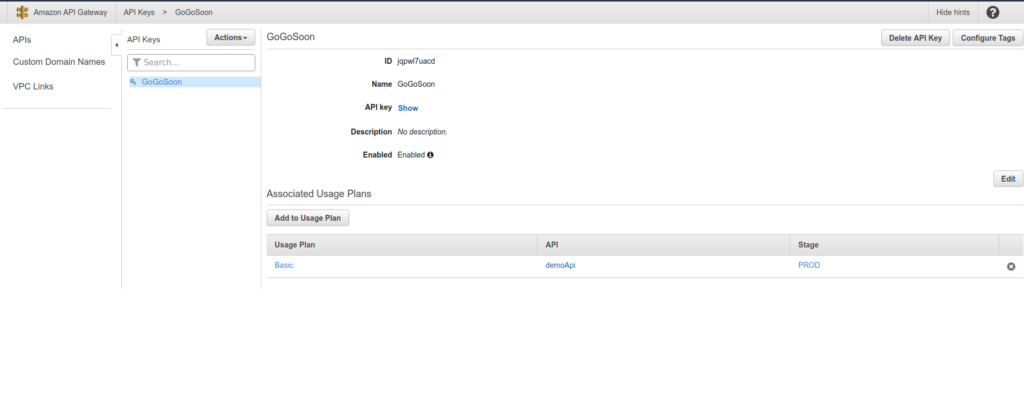
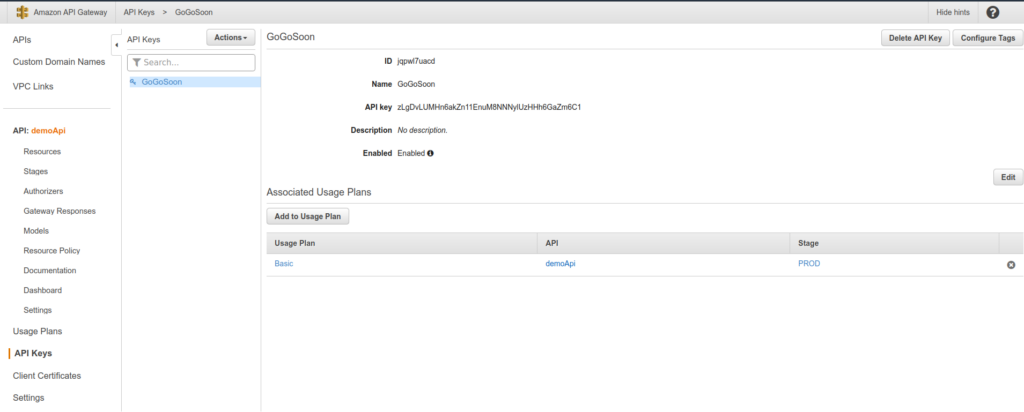
Step 6: Now Click on the Usage Plans from the Sidebar, Select your plan and navigate to the “API Keys” tab.
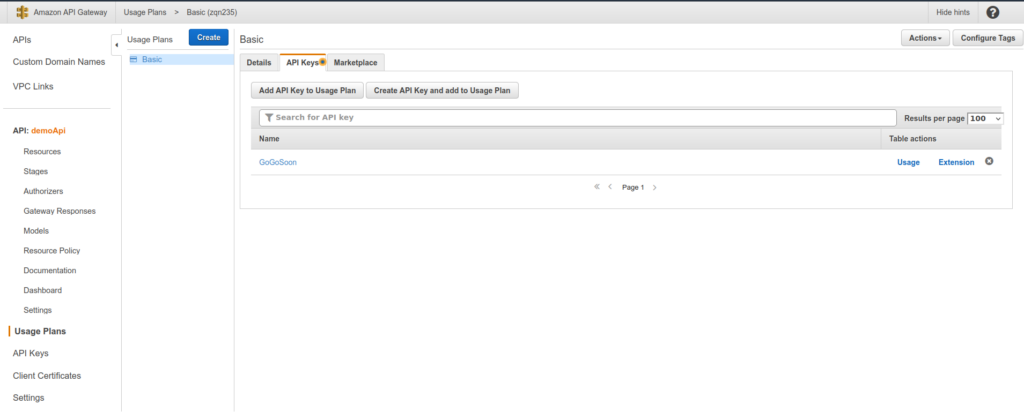
Step 7: Click on the API key you created in Step 3. Click “Show”. Copy the API key.
Step 8: You have to pass the API Key in the ‘x-api-key’ header. Let’s switch to terminal to test this out. Let’s verify our Rest API without passing the API key at first. Open the terminal, and enter the following curl command. You will once again see the forbidden message
curl --location --request GET '[enter your invoke url]'
--header 'Content-Type: application/json
Let’s pass the API key this time. Run the following curl command.
curl --location --request GET '[your invoke url]' \
--header 'x-api-key: [your api key]' \
--header 'Content-Type: application/json' \
--data-raw ''
You can see the output of the Lambda function because we passed ‘x-api-key’ in the header.
Awesome we have successfully created the Usage plan, generated the API key, and attached it to the Rest API method and verified the integration.
Conclusion
In this blog, you learned what is AWS API gateway and how to create Usage Plans for the Rest API
Hope you enjoyed reading the article. If you feel stuck at any point feel free to post a comment in the comments section.
If you wish to learn more about AWS, subscribe to my newsletter by entering your email address in the below box.
Have a look at my site which has a consolidated list of all my blogs.