Imagine you run a popular e-commerce website that experiences a significant increase in traffic during holiday sales or special promotions. Your servers might get overwhelmed by the sudden surge in visitors, leading to slow page loading or even server crashes. This could result in frustrated customers abandoning their shopping carts and a loss of revenue.
To avoid this situation one can use load balancers. AWS offers various load balancers like Application Load Balancer(ALB), Network Load Balancer(NLB), and Gateway Load Balancer.
In this article, we’ll see about Application Load balancers and how to implement them. Before we start let’s understand a bit about load balancer.
Table of Contents
What is Load Balancer
Quoting from official AWS documentation
A load balancer serves as the single point of contact for clients. The load balancer distributes incoming application traffic across multiple targets, such as EC2 instances, in multiple Availability Zones. This increases the availability of your application. You add one or more listeners to your load balancer.
In simple words, Load Balancers are servers that forward traffic to available server.
For example, Assume we have 3 servers (EC2 instances) fronted by a load balancer. Now think like 3 users directly connecting to the load balancer. The load balancer decides which server should handle each user’s request.
Let’s say the first user arrives. The load balancer sends their request to one server, which we’ll call “Server A.” Then, another user comes in, and the load balancer sends their request to a different server, “Server B.” Finally, a third user arrives, and their request is sent to “Server C.”
This way, no one server gets too busy, and everything stays fast and responsive.
The cool part is that the users do not know which backend instances they’re connected to. They just know that they have to connect to your load balancer, which gives them one endpoint of connectivity only.
Benefits of using Load Balancer
Some of the benefits are
- Distribute Load across multiple servers
- Expose a Single point of access (DNS) to your application
- Effortlessly handle failures of downstream instances
- Do regular health checks to your instances
- High availability
What is Application Load Balancer?
Application Load Balancers operate at the OSI layer 7 (the application layer) and are designed to route traffic based on application-specific content. They are well-suited for handling HTTP/HTTPS traffic and can intelligently distribute requests based on URL, hostname, or cookies. ALBs are ideal for scenarios where multiple services or microservices are hosted on the same set of servers.
Hands-On: Implementing an Application Load Balancer
Now that we have understood about load balancers, let’s get our hands on implementing an Application Load Balancer in AWS.
Step 1: Launching EC2 Instances
- Log in to your AWS Management Console.
- Navigate to the EC2 Dashboard.
- Click on “Launch Instances” to start creating new EC2 instances.
- Configure the instance settings, such as instance type (e.g., t2.micro), Amazon Linux image, and security groups (allow ssh,http and https traffic)
- In the Advanced Details section, paste the code in the User data input.
#!/bin/bash
# Use this for your user data (script from top to bottom)
# install httpd (Linux 2 version)
yum update -y
yum install -y httpd
systemctl start httpd
systemctl enable httpd
echo "Hello World from $(hostname -f)
" > /var/www/html/index.html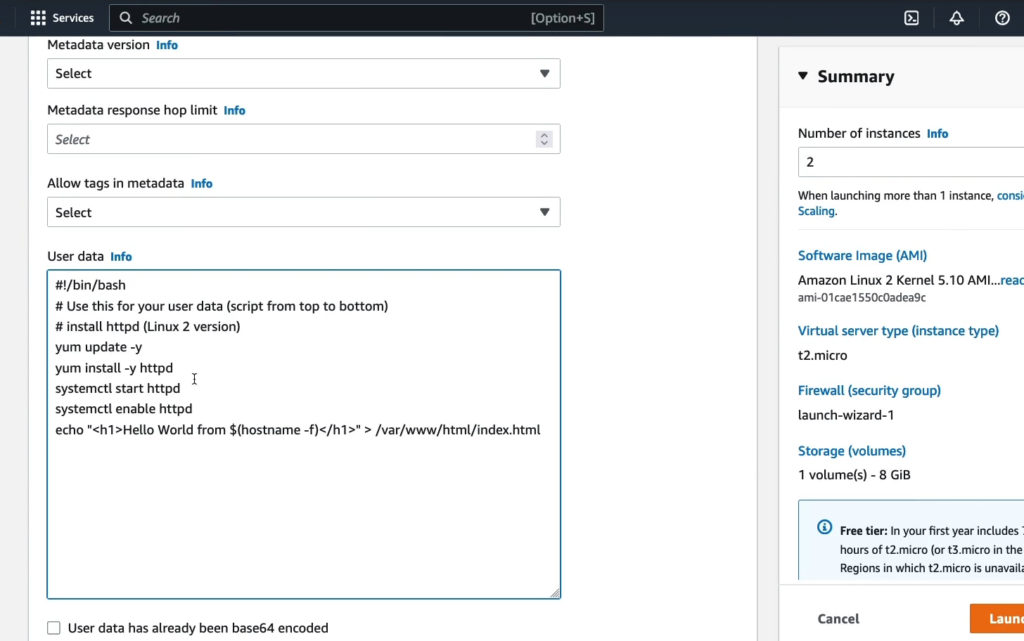
6. Launch two instances, providing distinct names for each (e.g., “My First Instance” and “My Second Instance”).

Step 2: Accessing Instances
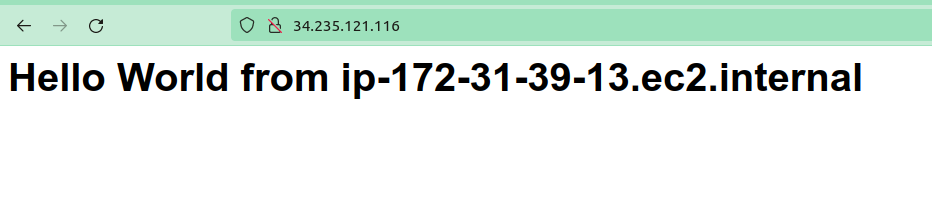
- After launching the instances, copy the IPv4 address of the first instance. Open a web browser and paste the IPv4 address you can see the message “Hello World from [your first instance ip address]”
- Repeat the same for second instance you can see “Hello World from [your second instance ip address]”

Step 3: Creating an Application Load Balancer
- Navigate back to the EC2 Dashboard.
- Scroll down to “Load Balancing” and choose “Load Balancers.”
- Click “Create Load Balancer.”
- Select “Application Load Balancer.”
- Name your ALB (e.g., “DemoALB”).
- Choose an internet-facing scheme and IPv4 address type.
- In Network Mappings select atleast 2 availabilty zones. I recommend to select all the avaliability zones because the load balancer will send traffic only to selected availability zones
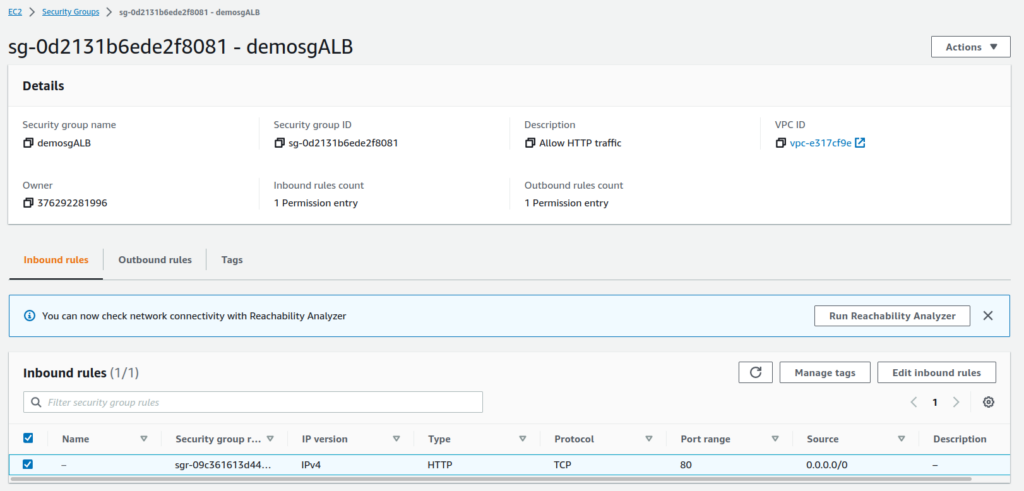
- For security group, remove the default, create new security group and allow only “HTTP” (port 80) traffic
9. Define listeners and routing – Route traffic from HTTP on port 80 to a target group. Click on “Create target group” to create a new target group
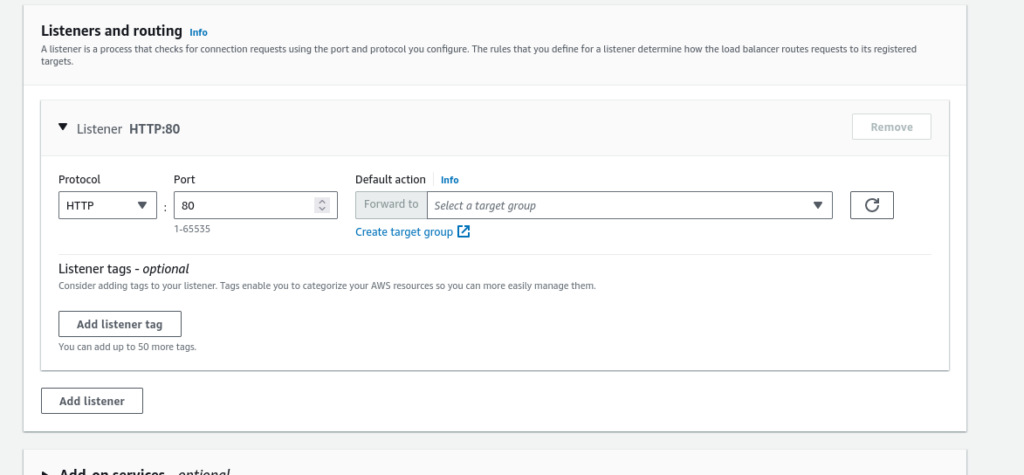
Listeners and Routing for ALB
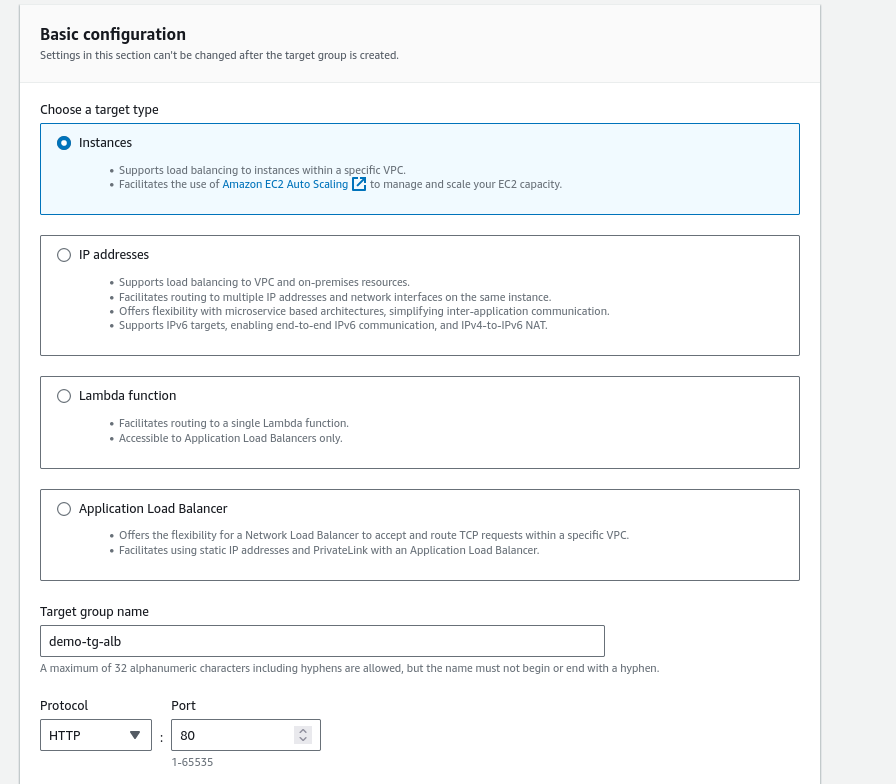
Step 4: Creating a Target Group
- Choose a target type as Instances
- Name the target group (e.g., “demo-tg-alb”).
- Choose “HTTP” for protocol and port 80.
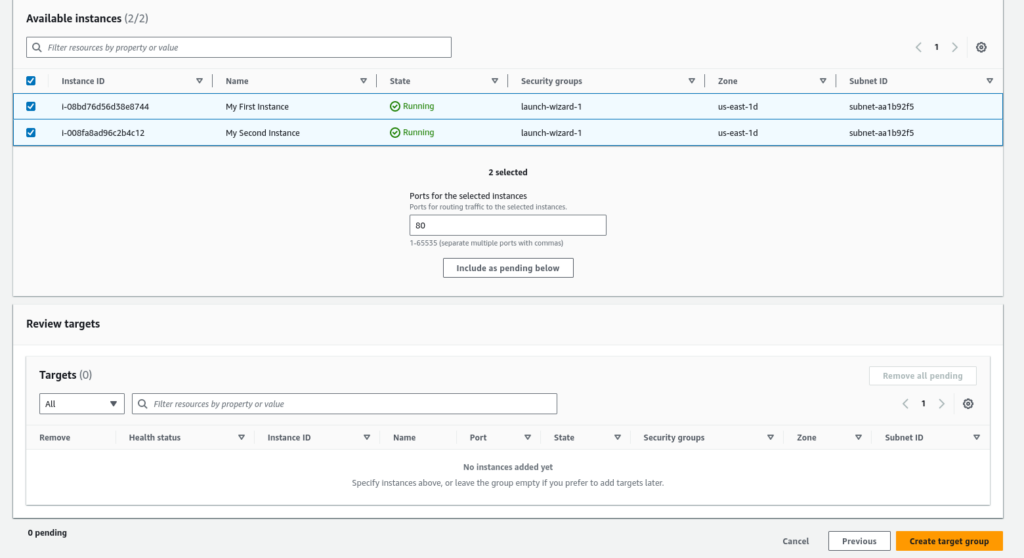
- Register both EC2 instances you created in the first step by selecting the both instances and clicking on “Include as pending below” button
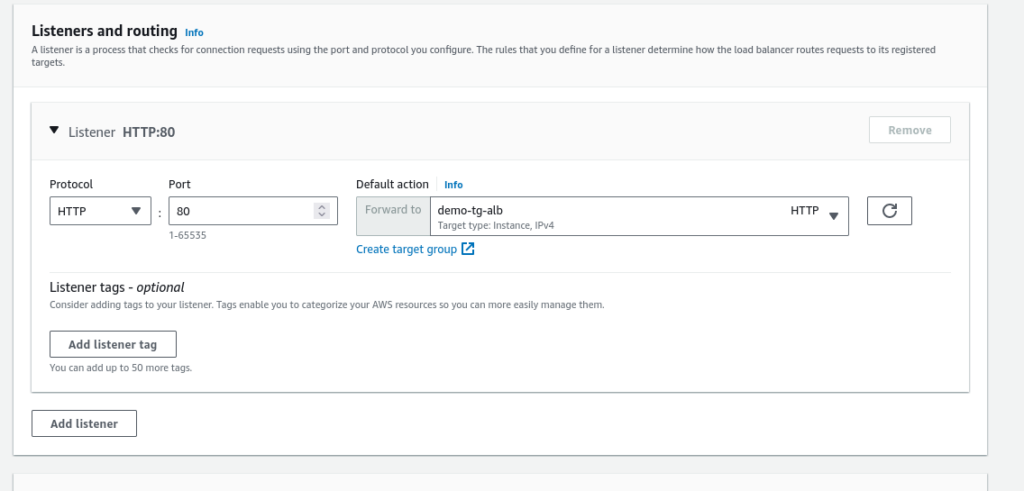
Step 5: Linking Target Group to ALB
- Go back to the ALB configuration
- Under “Listeners,” associate the ALB with the target group you created
Step 6: Launching the ALB
- Complete the ALB creation process by clicking on “Create load balancer” button at the bottom of the page
- Wait for the ALB to become active and obtain its DNS name.
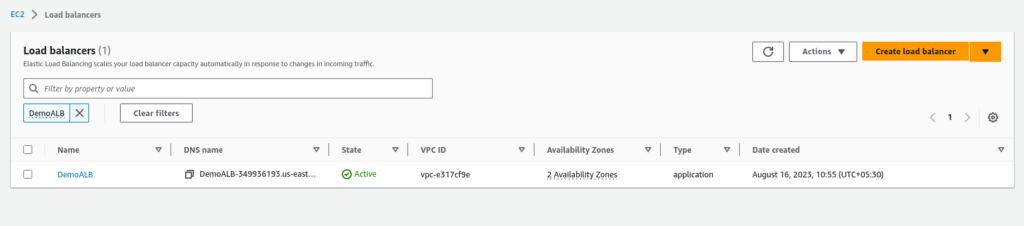
Step 7: Testing the Load Balancer
- Copy the DNS name of your ALB.
- Paste the DNS name in a new web browser tab.
- Refresh the page multiple times to see the load balancing in action, distributing traffic between the instances.


Bonus Point
Now you can access the application both by using the EC2 IPv4 address or DNS of the load balancer. But its not recommended to allow others to hit your EC2 instances directly. If the EC2 is open hackers can easily hack your server.
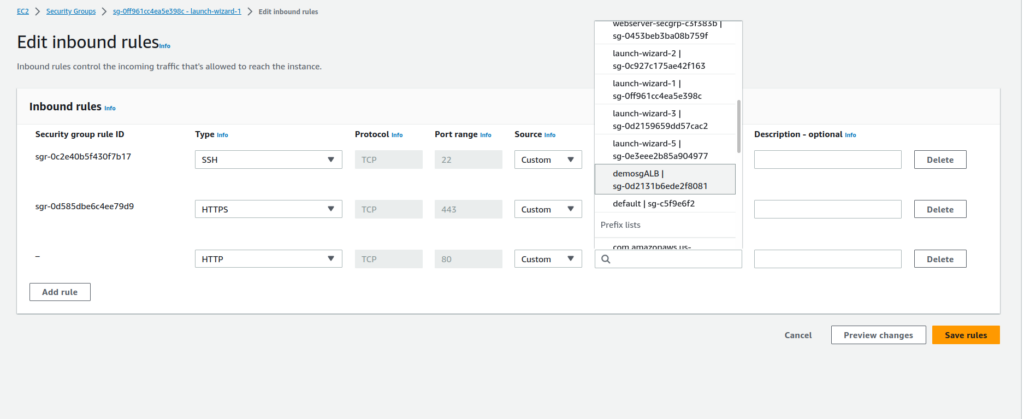
To avoid this situation edit the security group of your EC2 instances delete the HTTP rule and add rule allow HTTP only from the security group (select the security group you created for the Load Balancer) and save the rule
Now if you hit the IPv4 address of the EC2 instances the page will not be loaded
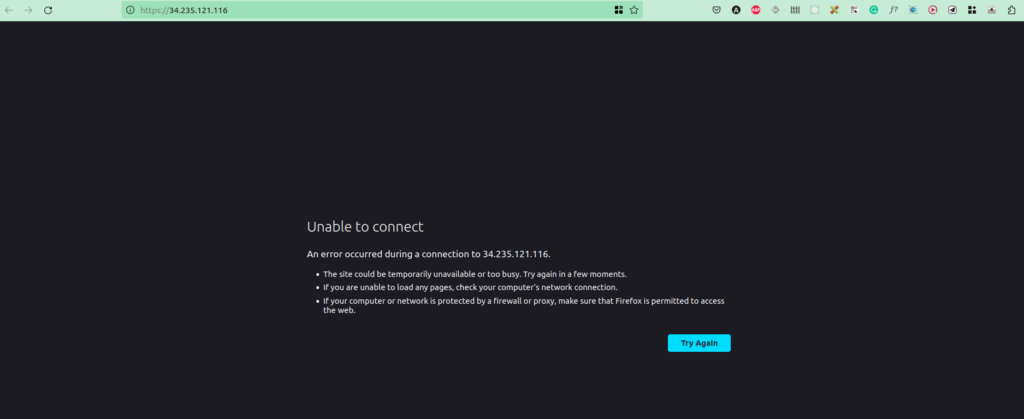
You can access the server only using the DNS of the application load balancer

Conclusion
Congratulations! You’ve successfully set up an Application Load Balancer on AWS. By following these steps, you’ve learned how to create a reliable and efficient environment for your applications, ensuring they stay responsive and available even when one instance experiences issues.
AWS’s Load Balancer takes care of distributing traffic seamlessly, maintaining the health of your instances, and improving the overall performance of your applications.
Hope you learned something new. If you wish to learn more about AWS, subscribe to my newsletter by entering your email address in the below box.
Have a look at my site which has a consolidated list of all my blogs.