

Flutter is one of the latest and leading frameworks to build applications. Most companies are trying to build their applications with Flutter. This is because of its outstanding performance having a benchmark of 60 Frames Per Second (FPS). With this, it outperforms other cross-platform technologies and is even considered a best-performing framework when compared with native languages.
I’m a React Native enthusiast. After hearing all the advantages of Flutter, I decided to try out Flutter. I would like to share my learning experience with everyone via my blogs. Here’s my first blog.
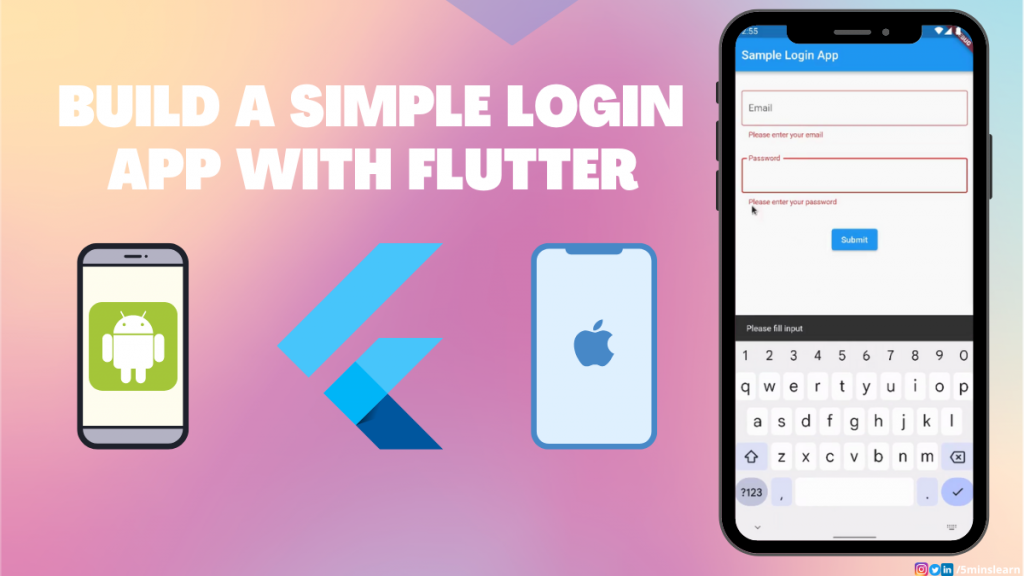
In this article, we’ll learn to create a flutter app with a login layout and a few functionalities.
Prerequisite
In this article, I’ll not cover the steps to install Flutter on your machine. I feel it’s better explained on the official documentation site of Flutter.
I would highly recommend you try this exercise offered by the official Flutter community. This exercise will give you a quick understanding of Flutter. Trust me, it’ll be too simple and it’s enough to get yourself started with Flutter. No problem even if you don’t understand a few concepts mentioned there. I’ll be writing about them in my upcoming blogs. Personally, I’ve started my Flutter journey from there and I feel more confident after completing that exercise on my own.
Let’s get started building our app!!!
I believe in the saying, “Setting a goal is a half work done”. So, whenever I try to do something, I will set a goal to see where I want to be when I finish that. But, what’s the goal of reading this blog? Our goal is to build this app.
Required Tools
To build this we need the following items installed on your machine,
- Visual Studio Code (One of Flutter’s recommended IDE)
- Android Emulator / iOS Simulator / Original device
- Flutter Installed (I would recommend following this guide to install)
- Flutter plugin for VS Code (Recommended Guide)
Create a project
Navigate to the folder you want to create your app.


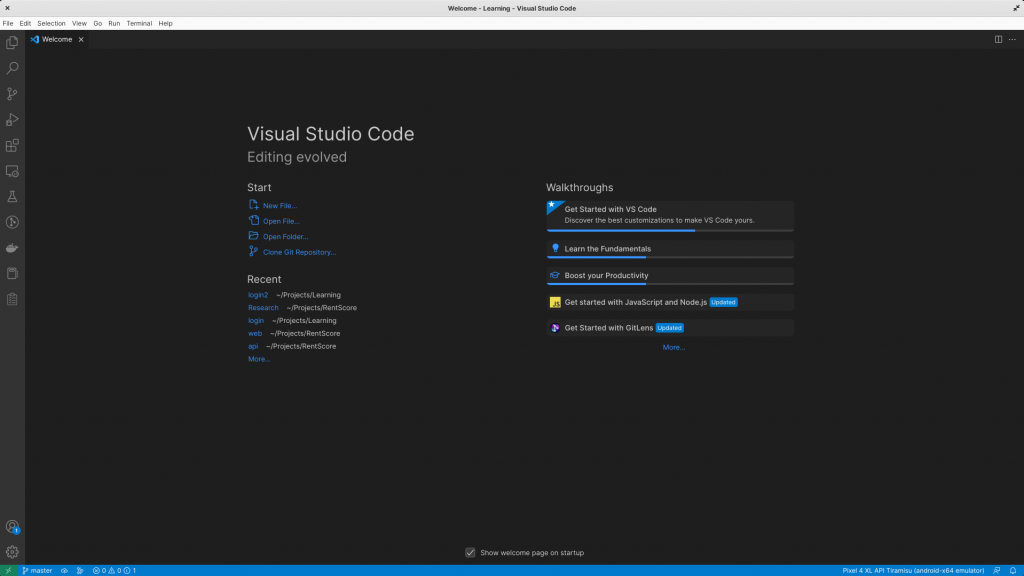
Open Visual Studio Code from that directory.


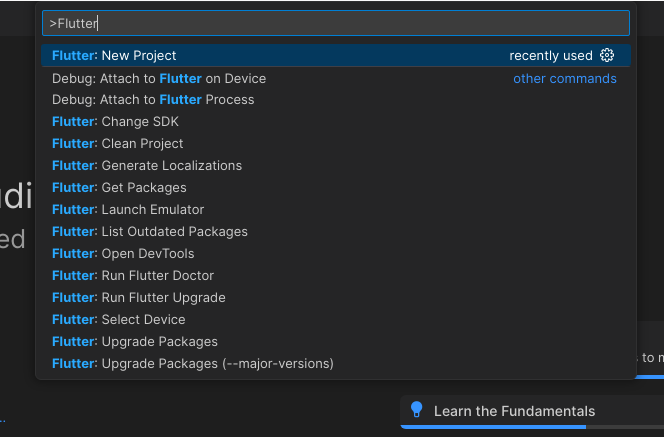
Open the command palette by pressing CTRL + SHIFT + P and type Flutter. Choose Flutter: New Project from the listed options.

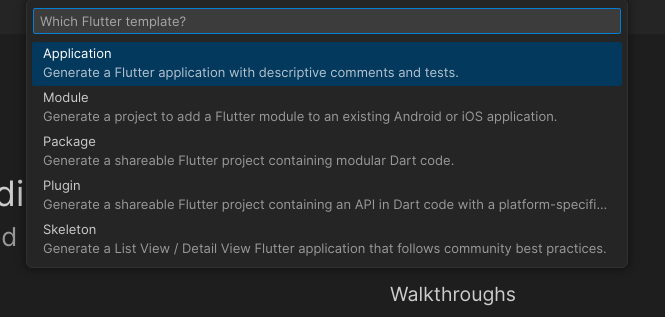
Select Application from the next list.

ApplicationIt’ll ask you to Select the target folder to create the project. By default, it’ll be in the same folder where you opened VS Code. Type your app name in the text input and hit Enter. I’m naming it as loginapp, but you can type any name as per your wish.


In the next few seconds, a new Flutter project will be created by VS Code and you’ll see a screen like the one below.

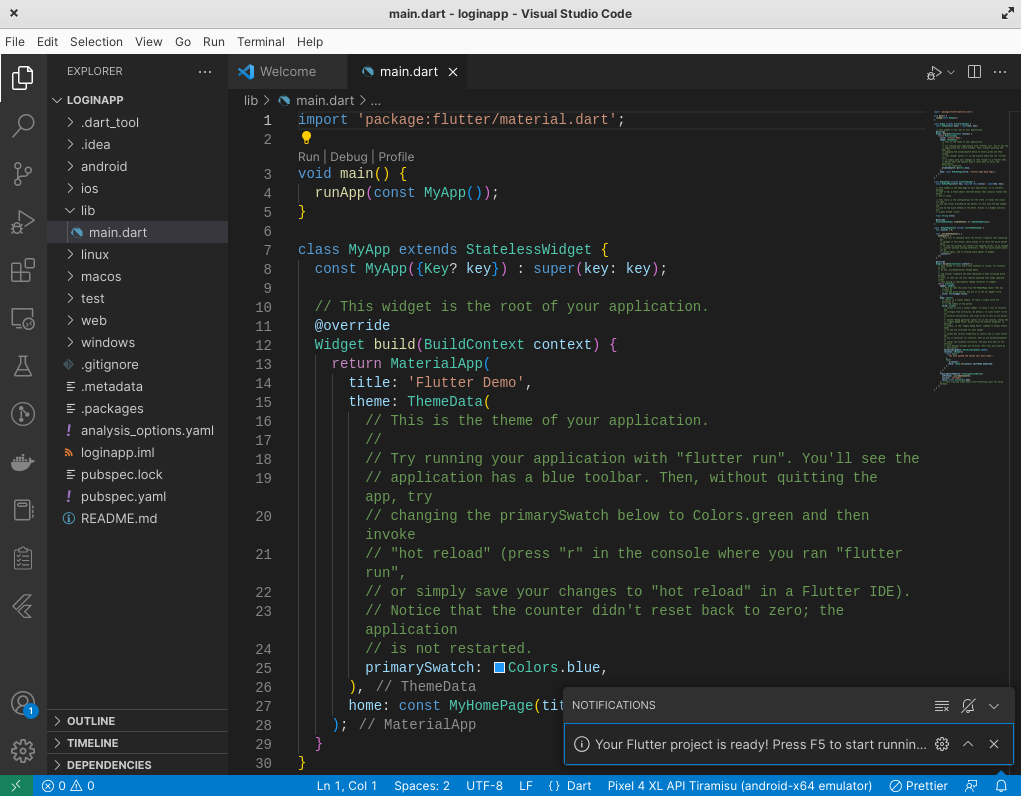
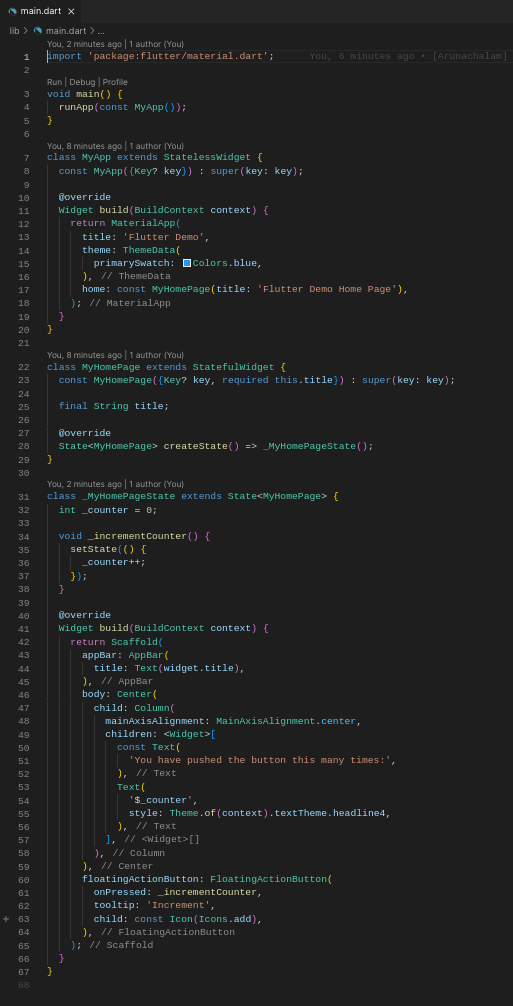
By default, main.dart file will be opened. This is where Flutter begins to run our app. At the bottom, you will see a notification saying “Your Flutter project is ready! Press F5 to start running …”.
Spin up the device
To run your app, you need to have either a virtual device or an actual device running and connected to your machine. I’ll be using an Android Emulator to run our app. You may either run a virtual device or connect your mobile phone to your machine. But remember to turn on “USB Debugging” if you’re debugging via an Android phone.
Once you connected or spin up a virtual device, look at the bottom right of the VS Code and press the device option.


Sometimes, VS Code will select the device by default, but for the first time, you have to select it on your own. Press the “No Device” text in the above screenshot or whatever the device name is shown to you at that place.
You’ll be shown the list of available virtual devices available and connected. Click on the device you want to run your app.


Once you’ve selected your device, the bottom panel will show your selected device name similar to the below screenshot.


Run the app
Are you ready for the Rocket Launch?
Press F5 to run your app. This will take some time. It’ll be compiling and building your project. Once it’s ready, the app will be running on your device.

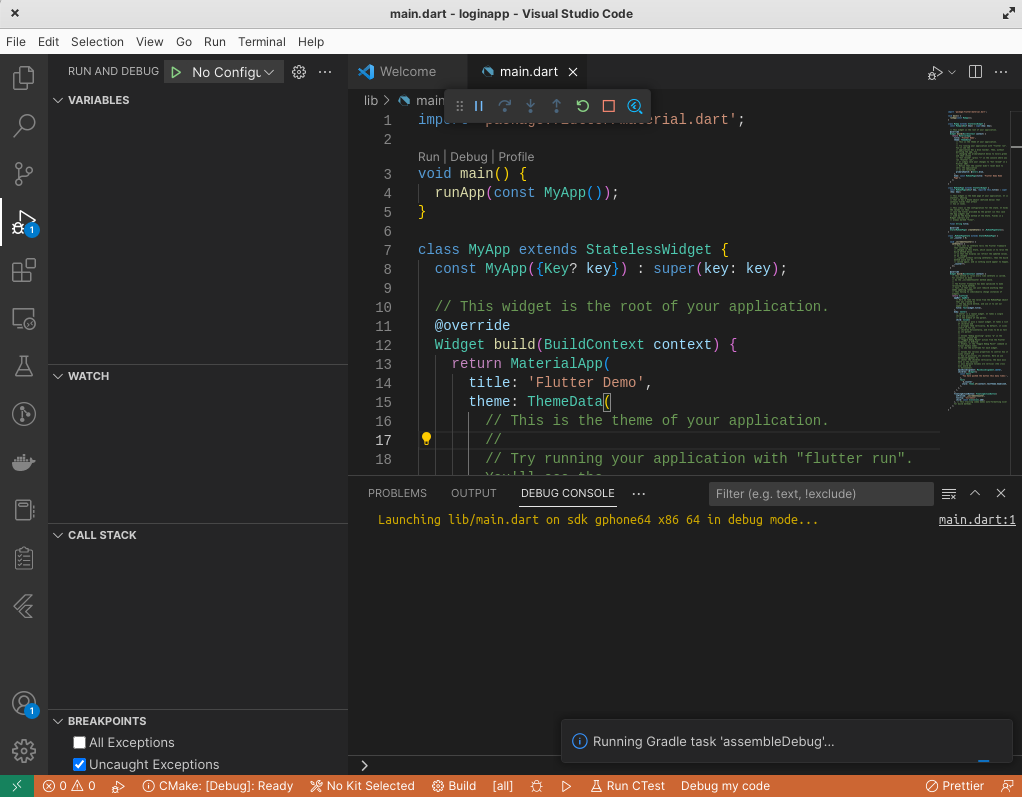
You’ll see a similar kind of interface. At the bottom, you can see the notification saying “Running Gradle task ‘assembleDebug…'”.
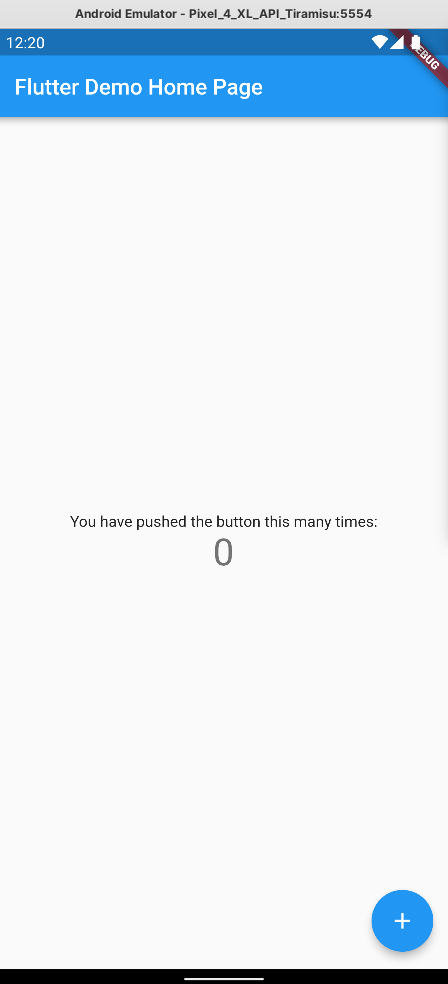
Excited for the output. Here you go,

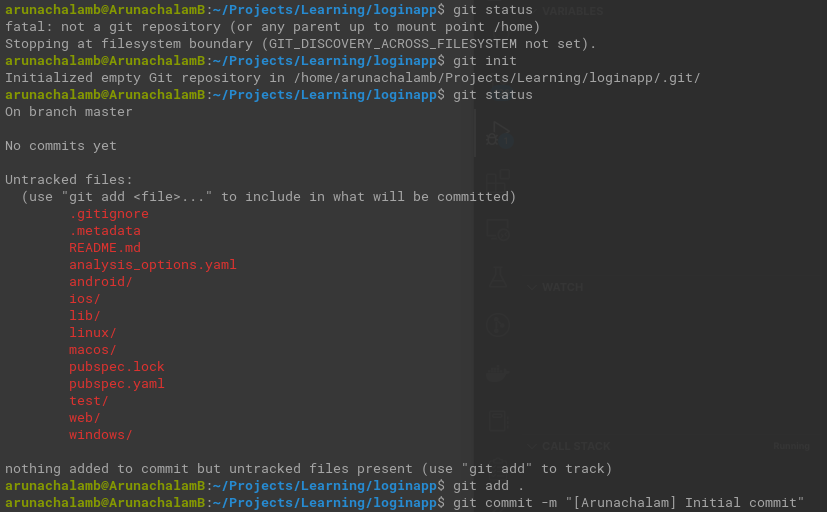
Don’t make any changes to the code now. Your changes will not be tracked as Git is not initialized for this repo. This is one part that I like about React Native. Whenever you create a React Native app, an initial commit will be made by itself. You can just go forward and make your changes and you’ll be able to see all your changes being tracked. This is not available till today (Mar 2023) in Flutter, but I hope the Flutter team may add this in the future.


Remove comments
I hate comments in the code. I love writing readable code. Let’s remove all the comments in the main.dart file. Don’t touch other files. All the Flutter files will reside under lib/ directory having the .dart file extension. For this entire blog, we’ll be working only on the main.dart file. You can read the comments and get some insights from their code. You can ignore this step if you want to keep the comments as it is.

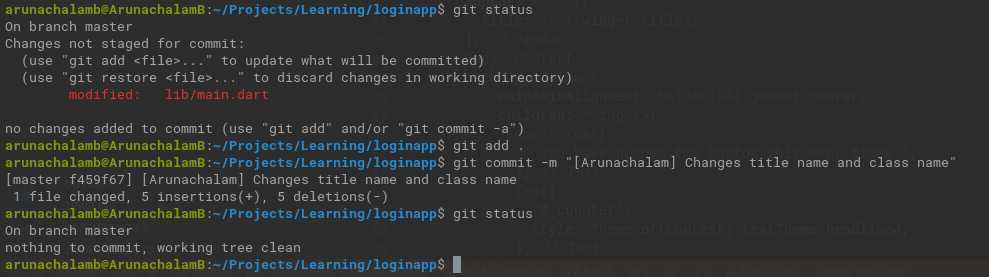
My code has become super simple now. I’ve made a commit here (after removing the comments). If you have come this far, after committing just ensure your app is running fine and no changes on UI.
Change the name
Let’s change the name of the title bar and the internal class names. On the MyApp class, inside the build method, replace the title in the home field from “Flutter Demo Home Page” to “Login App”.

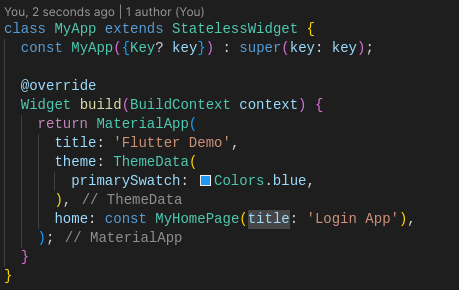
Let’s change our class name from “MyHomePage” to “Login”. Place the cursor on the “MyHomePage” text and press F2. F2 is the shortcut key to rename and refactor in VS Code. This means, it renames at current place and replaces all its usages.

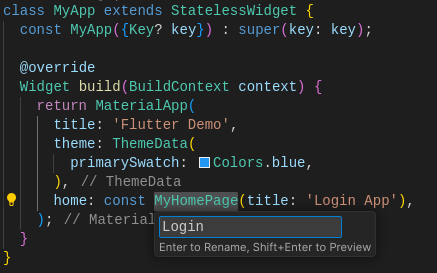
LoginLet’s commit our changes.

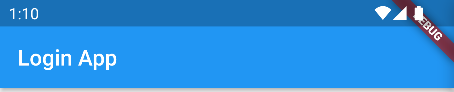
You should be able to see the title “Login App” in your app.

Build our app
Let’s build our app. Copy the below code and replace it with the _LoginState class in the main.dart file.
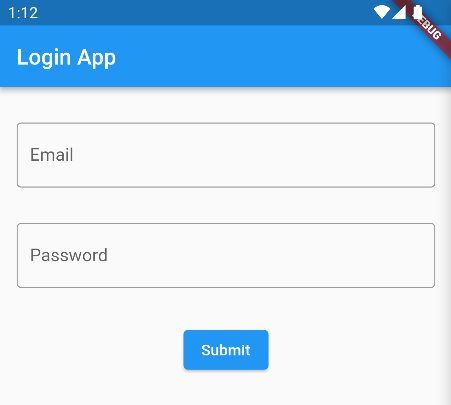
Immediately after you paste and save the file, your UI will change like magic.

Let’s dismantle the code you copied into parts and try to understand them.


The first line indicates that you’re creating a key for a form. In our context, it is the login form. You’re creating it to identify the form uniquely. It is set to final, so that it’ll not change.
The next 2 lines are definitions of controllers. A controller in our context is used to read the values from the input. Using a controller, you’ll be able to control its associated component.
Let’s dismantle the build method. build method in Flutter is used to build the UI. It contains the design code. The content returned from this method will be rendered on the UI.

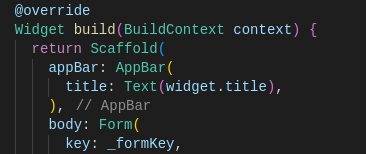
build methodThe Scaffold is a widget in Flutter used to implement the basic material design visual layout structure. Assume the widget as a simple UI component. We’re setting the title passed as a parameter to this class. We can access the parameters using the widget object. So, it goes like widget.{key_name}. If you want to access the title property, then it’ll be widget.title. This is similar to passing props in React.

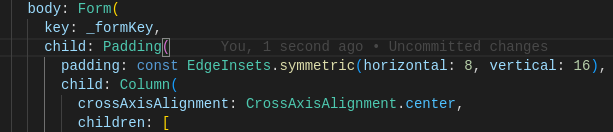
body of the UIThe next section is body. As we’re building a simple login app, we need a form to be filled out by the user to authenticate. We’re setting the unique key which we created above to this form. The Form accepts a child. It can accept only one component. We are creating a layout with horizontal padding of 8px and vertical padding of 16px. This Padding widget also accepts only one child. Column is a widget in Flutter that is used to display its children in a vertical array. We set crossAxisAlignment to horizontally center the contents of the Column widget.
As we saw Column widget displays its children in a vertical array, we can pass multiple widgets in its children property.

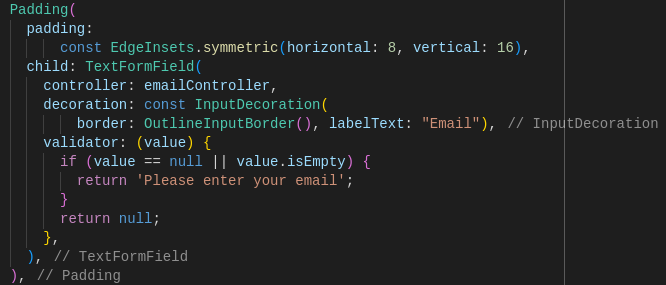
Email field in the formThe first item, we want to display in the UI is an input box to get the email address of a user. So, we used the TextFormField widget and set the controller to emailController. In order to get the floating text, we need to use the decoration option which asks for the type of border and the labelText of the input. We can add any default validation to be applied when this form is submitted in the validator field. We’re validating if it’s either null or empty value and return an error if any of them matches. If it has some value, then we’re not throwing any errors and returning null.

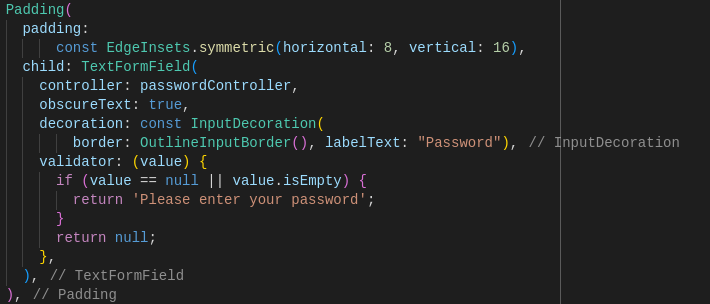
Password field in the formThe second item is the input box to get the Password from the user. This is exactly similar to the email field except for one. We should hide the password in the input field and display the dot for each typed character. To achieve that, we have to pass a obscureText property to the TextFormField widget and set it to true. The decoration, validation, and other items remain the same as that of Email.

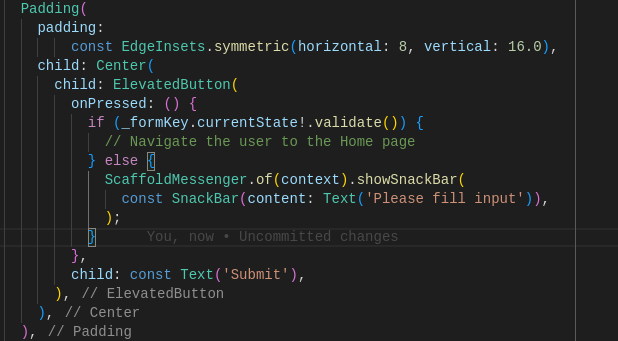
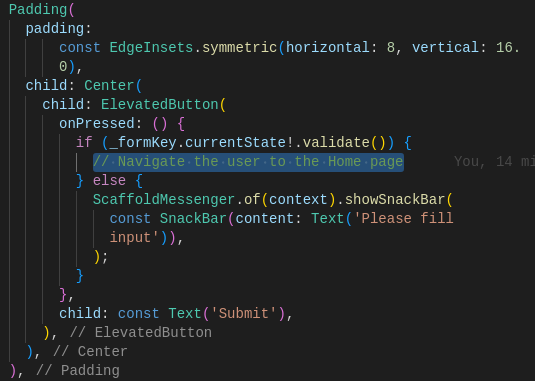
Submit the formThis is the final piece of our form, which is a submit button. We’re using a ElevatedButton widget and passing the button text in the child property of the button. We define the action that should be followed when pressing this button in the onPressed property. In our case, we’re validating the input fields (remember the validator property we defined for the email and the password input box). If the validation has passed, we should navigate the user to the next screen (which we’ll be adding in some time), if not we show a message asking the user to fill in the inputs (“Please fill input”).
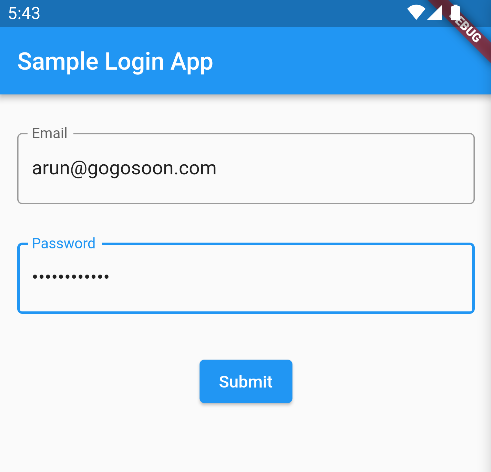
It’s time to verify if our code is working fine. Check your app. Try to submit without entering any input and you should notice the Snackbar at the bottom with the text “Please fill input”. Fill in the input boxes with some random values and try to submit and you should not be seeing the error now.
If you’re facing any errors in viewing the UI, most of the time (almost 90%) it’ll be with brackets. We’ll be using a lot of brackets in Flutter which will confuse beginners a lot. Ensure you have the proper opening and closing of brackets. The Flutter app may terminate in the middle in case of any errors. In such case, after applying the fix press F5 to restart the app.
Navigate on Login
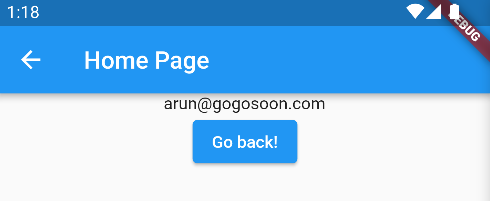
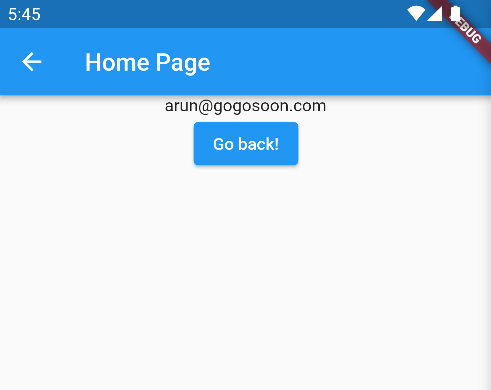
Let’s navigate the user to the Home page on successful login and show the email address which the user entered on the Login page. Something similar to the below screenshot.

Go to the last line of the main.dart file and copy & paste the below content.
In this code, we are creating a new class called “HomePage” and extending it from “StatelessWidget”. We receive an email from the previous page.

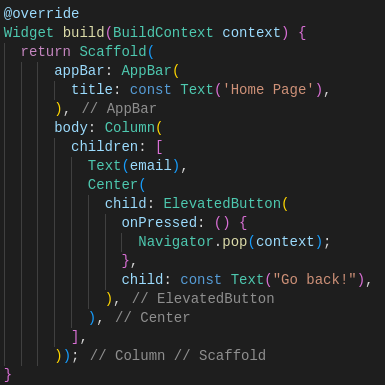
On the build method, we define the title of the page to be “Home Page” and its body contains a Text and ElevatedButton widget. The Text widget will display the email address passed from the previous screen. The ElevatedButton widget will navigate the user to the previous screen whenever it’s pressed. We use Navigator.pop(context); to navigate to the previous screen.
Let’s understand how to navigate from the Login page to the Home page.

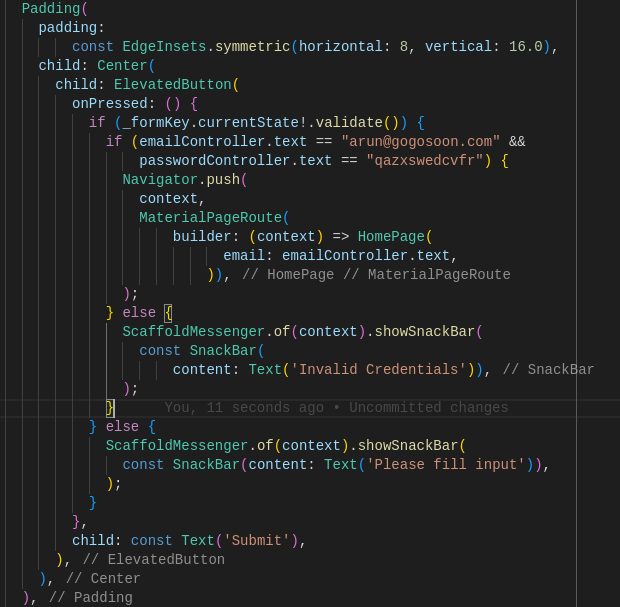
Remove the comment we made on validation condition (“Navigate the user to the Home page”) and replace it with the below content.
if (emailController.text == "arun@gogosoon.com" && passwordController.text == "qazxswedcvfr") {
  Navigator.push(
    context,
    MaterialPageRoute(
      builder: (context) => HomePage(
        email: emailController.text,
    )),
  );
} else {
  ScaffoldMessenger.of(context).showSnackBar(
    const SnackBar(
      content: Text('Invalid Credentials')),
    );
}
Here’s the final code for Submit button.

Let’s try to understand this code.
In addition, to form validation, we are adding another layer of validation which checks if the user has typed the email address as “arun@gogosoon.com”, (which is my email address, you can replace it with whatever you want) and the password as “qazxswedcvfr”. We navigate the user to the Home page if the entered credentials match, show “Invalid Credentials” in the Snackbar otherwise.
That’s it. We have covered a very basic login validation. Try to run the app and check if your app works as expected.


Conclusion
In this article, you have learned to build a basic version of the login app using Flutter. Hope you’re clear on the flow of building the Flutter app.
If you’re much more curious to learn Flutter further, try out the exercise I’m attaching below. Searching, applying the code, and getting the result by yourself will make you more confident in Flutter app development.
- Try to add an eye icon at the end of the “Password” input field. Clicking on it should toggle showing the password in plain text and hidden text
- Clear the Email and Password input fields before navigating to the Home page
- Add additional regex validation for email input
- Add validation to the password field if the user has entered at least one number, alphabet, and a symbol
- Add a “Signup” button below the “Submit” button which should navigate the user to a new “Signup” page
If you wish to learn more about Flutter, subscribe to my article by entering your email address in the below box.

Have a look at my site which has a consolidated list of all my blogs.